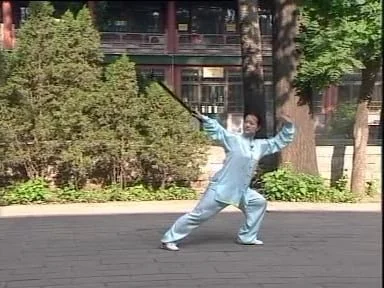
Tai Chi Cane 36 Form Combination Sep 10 Written By Amin Wu 課程內容:3小時36分鐘 [查看課程 →] Tai Chi Cane 36 Form Overview of the Tai Chi Cane Read more → Part 1 • Demonstration • Front View Read more → Part 1 • Introduction Read more → Part 1 • Forms 1-3 Read more → Part 1 • Forms 4-6 Read more → Part 1 • Forms 7-9 Read more → Part 1 • Key Points Read more → Part 1 • Demonstration • Back View Read more → Part 2 • Demonstration • Front View Read more → Part 2 • Introduction Read more → Part 2 • Forms 1-3 Read more → Part 2 • Forms 4-6 Read more → Part 2 • Forms 7-9 Read more → Part 2 • Key Points Read more → Part 2 • Demonstration • Back View Read more → Part 3 • Demonstration • Front View Read more → Part 3 • Introduction Read more → Part 3 • Forms 1-3 Read more → Part 3 • Forms 4-6 Read more → Part 3 • Forms 7-9 Read more → Part 3 • Key Points Read more → Part 3 • Demonstration • Back View Read more → Part 4 • Demonstration • Front View Read more → Part 4 • Introduction Read more → Part 4 • Forms 1-3 Read more → Part 4 • Forms 4-6 Read more → Part 4 • Forms 7-9 Read more → Part 4 • Key Points Read more → Part 4 • Demonstration • Back View Read more → 立即購買 | Purchase Now — $25 Amin Wu
Tai Chi Cane 36 Form Combination Sep 10 Written By Amin Wu 課程內容:3小時36分鐘 [查看課程 →] Tai Chi Cane 36 Form Overview of the Tai Chi Cane Read more → Part 1 • Demonstration • Front View Read more → Part 1 • Introduction Read more → Part 1 • Forms 1-3 Read more → Part 1 • Forms 4-6 Read more → Part 1 • Forms 7-9 Read more → Part 1 • Key Points Read more → Part 1 • Demonstration • Back View Read more → Part 2 • Demonstration • Front View Read more → Part 2 • Introduction Read more → Part 2 • Forms 1-3 Read more → Part 2 • Forms 4-6 Read more → Part 2 • Forms 7-9 Read more → Part 2 • Key Points Read more → Part 2 • Demonstration • Back View Read more → Part 3 • Demonstration • Front View Read more → Part 3 • Introduction Read more → Part 3 • Forms 1-3 Read more → Part 3 • Forms 4-6 Read more → Part 3 • Forms 7-9 Read more → Part 3 • Key Points Read more → Part 3 • Demonstration • Back View Read more → Part 4 • Demonstration • Front View Read more → Part 4 • Introduction Read more → Part 4 • Forms 1-3 Read more → Part 4 • Forms 4-6 Read more → Part 4 • Forms 7-9 Read more → Part 4 • Key Points Read more → Part 4 • Demonstration • Back View Read more → 立即購買 | Purchase Now — $25 Amin Wu